
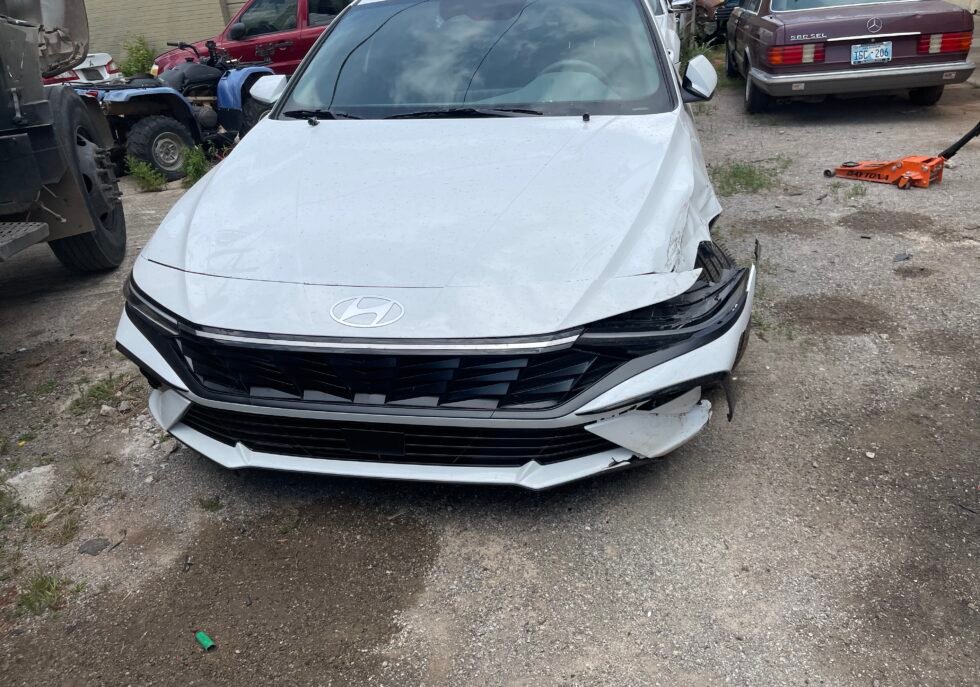
You know the sound. It’s that distinctive, hollow thud of plastic meeting a pole in a tight parking garage. Your stomach drops before you even get out to look. Bumper dents are the most common battle scar on Oklahoma City roads, but they don’t always require a claim against your insurance.
Modern automotive engineering actually works in your favor here. Manufacturers build bumpers from resilient thermoplastics designed to absorb energy and, under the right conditions, snap back to their factory shape. Before you stress over the cost, assess the damage. You might be able to reverse it in your driveway with tools you already own.
Core Insights
- Most bumpers made after 2010 are Thermoplastic Olefin (TPO) or Polypropylene (PP). These plastics have “memory” and respond well to heat.
- You can often fix round, soft dents at home. Sharp creases or folded plastic edges usually require professional body fillers and repainting.
- Applying boiling water or a heat gun softens the plastic matrix, allowing it to relax back into its original molded form.
- If your car has parking sensors or lane-assist cameras in the bumper, DIY repair risks misaligning these safety systems.
- A DIY fix costs under $50 in supplies. However, if you crack the paint, professional restoration is the only way to stop peeling and rust.
Can You Safely Fix Your Bumper at Home?
You cannot treat every bumper the same way. Before you grab a heat gun, you must confirm what material you are working with and the severity of the impact
Material Identification
Successful repair depends entirely on the substrate. The vast majority of passenger vehicles on the road today utilize thermoplastic bumpers. These materials, specifically Polypropylene (PP) and Thermoplastic Olefin (TPO), are flexible. They are designed to deform on impact to protect pedestrians and reduce low-speed damage.
To confirm this, look for a stamp on the inside or bottom edge of the bumper cover. You will see codes like “PP,” “TEO,” or “TPO.” If you drive a vintage vehicle or a heavy-duty truck with chrome or steel bumpers, heat methods will fail. Metal has no elastic memory, once bent, it stays bent until mechanically forced back by a professional with body hammers and dollies.
Damage Type Comparison
The shape of the dent dictates your success rate.
- Green Light (DIY): Large, round compressions where the paint remains unbroken. This indicates the plastic flexed but did not shear.
- Yellow Light (Caution): Dents located directly on a body line (the sharp aesthetic ridges on the car). These are difficult to pop out perfectly without leaving a visible wave.
- Red Light (Professional Only): Punctures, tears, or “spiderweb” cracks in the paint. Heat cannot fix broken paint bonds or torn plastic. These require sanding, flexible filler, and professional refinishing.
Safety and Technology
Modern bumpers are not just plastic shells, they are sensor housings. Behind that plastic cover sits the radar for adaptive cruise control, blind-spot monitoring modules, and airbag impact sensors. If the dent is near a sensor, or if the sensor housing looks pushed in, stop immediately. A misaligned sensor by even one degree can cause your safety systems to fail or activate incorrectly. Syed Brothers Auto Body Shop OKC utilizes OEM targets to recalibrate these systems, ensuring your vehicle’s safety features work when you need them.
Three Proven DIY Methods to Pop Out Plastic Bumper Dents
Heat softens the plastic polymers, making them pliable. Once soft, the material naturally wants to return to the shape it was molded in at the factory.
Method 1: The Boiling Water Technique
This is the safest method for your paint because water cannot exceed 212°F, which is generally safe for clear coats.
- Bring a large pot (at least 3-4 quarts) of water to a rolling boil.
- Pour the water slowly and continuously over the dented area for 30 to 60 seconds to heat the plastic through to the core.
- Reach behind the bumper (you may need to lie on the ground) and push the dent outward with a gloved hand or a blunt tool handle.
- Once the shape restores, immediately pour cold water over the area to “freeze” the plastic in position.
Method 2: Heat Gun or Hair Dryer Application
This method works well if you cannot get boiling water to the impact site, but it carries a higher risk of burning the paint.
- Clean the area to remove road grit that could bake into the finish.
- Set your heat gun to a low setting (around 200°F – 300°F). Keep the nozzle moving constantly, staying 6 inches away from the surface.
- Check the temperature with your hand frequently. The plastic should feel hot and slightly soft, not molten.
- Push from behind or use a suction tool from the front to pull the dent flush.
Method 3: Suction Cup Dent Puller
If you cannot access the back of the bumper, you must pull from the front.
- Clean the dent and the suction cup thoroughly with soapy water.
- Wet the rim of the suction cup to create an airtight seal.
- Heat the area using boiling water or a hair dryer to soften the plastic.
- Place the cup over the center of the dent, press firmly to engage the vacuum, and pull straight back with a sharp, strong motion.

Essential Gear for a Successful Home Bumper Repair
Using the wrong tools can turn a free fix into a paint correction bill.
- Heat Source: A heat gun is superior to a hair dryer for thick truck bumpers. Ensure it has variable temperature control.
- Dent Puller Kit: A bridge puller (using glue tabs) offers more precision than a simple suction cup, but requires more skill.
- Heat-Resistant Gloves: Boiling water splashes. Hot plastic burns. Wear heavy-duty mechanics gloves or leather work gloves.
- Blunt Pushing Tools: Never use a screwdriver. Use rounded wooden handles or specialized plastic pry tools to avoid poking through the soft bumper.
- Surface Preparation: Isopropyl alcohol or dish soap removes wax and grease, ensuring glue tabs or suction cups adhere properly.
The Risks of DIY Repairs on Modern Vehicles
DIY repairs focus on cosmetics, but professional repair focuses on structure and longevity. In Oklahoma’s climate, trapped moisture or micro-cracks can cause paint failure months after a home repair.
Structural Integrity
The bumper cover hides the actual safety equipment: the impact absorber (foam) and the reinforcement bar (steel/aluminum). A visual check of the plastic often misses crushed foam absorbers. If these remain damaged, your car loses its ability to manage energy in the next crash, transferring force directly to the frame or passengers.
Paint Complexity
Automotive paint is a chemical system, not just color. According to global paint supplier PPG, there are thousands of variations of “white” alone. If your DIY attempt cracks the clear coat, moisture will penetrate the base layer. This leads to flaking and oxidation. Syed Brothers Auto Body Shop OKC uses computerized color matching to blend new paint into the old, ensuring the repair is invisible to the eye and sealed against the elements.
Resale Value Impact
Dealerships and CarMax appraisers are trained to spot DIY repairs. They look for “ripples” in the reflection or stress marks in the plastic (often called “tiger striping”). A wavy bumper signals a prior accident, which can drop your trade-in offer by significantly more than the cost of a professional repair.
Professional Collision Repair in OKC
When heat isn’t enough, professional techniques restore the vehicle to pre-accident safety standards.
Paintless Dent Repair (PDR)
PDR technicians use specialized metal rods to massage dents out from the backside without disturbing the factory paint. This is the gold standard for value retention. For plastic bumpers, PDR works if the paint is intact and the plastic hasn’t stretched beyond its elastic limit.
Full Auto Body Shop Repair
If the paint is compromised, the shop must sand the area down to the raw plastic. Technicians apply a flexible adhesion promoter, followed by flexible body filler (not standard Bondo, which cracks on plastic). The bumper is then primed, blocked smooth, painted, and clear-coated.
Bumper Replacement
Sometimes, repair costs exceed the price of a new part. If the bumper has torn tab loops, broken sensor clips, or large cracks, Syed Brothers Auto Body Shop OKC sources OEM (Original Equipment Manufacturer) covers. This guarantees that body gaps are even and sensors snap in securely without modification.
Price is often the deciding factor. Here is what you can expect to pay in the current market.
|
Repair Method |
Estimated Cost |
Best For |
|
DIY (Boiling Water) |
$0 – $10 |
Large, shallow dents without paint damage. |
|
DIY (Heat Gun + Kit) |
$40 – $150 |
Medium dents, requires tool purchase. |
|
Professional PDR |
$150 – $450 |
Perfect finish, maintaining vehicle value. |
|
Body Shop Repair (Refinish) |
$400 – $800 |
Scratches, gouges, or paint cracks. |
|
Full Bumper Replacement |
$900 – $2,500+ |
Structural damage, torn plastic, sensor calibration. |
Value Proposition: If your car is a lease or a late-model vehicle, the $400 professional repair pays for itself by preventing thousands in devaluation at trade-in. For an older commuter car, the $10 DIY fix is often sufficient.
Your vehicle protects you and your family, it deserves professional care when damaged. While boiling water and suction cups provide a clever hack for minor cosmetic blemishes on plastic, they cannot resolve structural compromises, broken paint bonds, or misaligned safety sensors. When a dent involves deep creases, paint damage, or ADAS technology, a DIY attempt often costs more in the long run than a proper repair. If the dent has damaged the paint and requires repainting, understanding the cost of dent repair with paint can help you determine the appropriate repair approach.
Syed Brothers Auto Body Shop OKC delivers factory-grade restoration for drivers who value safety and aesthetics. We combine advanced color-matching technology with precise sensor calibration to ensure your vehicle looks, and protects, exactly as the manufacturer intended. Don’t let a parking lot mishap lower your car’s value. Call Syed Brothers Auto Body Shop OKC today for your free estimate and drive away with confidence.
Frequently Asked Questions
Can A Hair Dryer Really Pop Out A Bumper Dent?
Yes, but it is less effective than a heat gun. A standard hair dryer reaches roughly 140°F. This is hot enough to soften thin plastic on economy cars but may struggle with thicker bumpers on trucks or SUVs. You must hold the dryer close to the surface for a longer period (5–10 minutes) to achieve the necessary heat soak. This creates a risk of uneven heating.
Use a hair dryer only for minor, shallow indentations. For significant dents, the plastic requires the higher thermal transfer of boiling water to release the tension in the material.
Is It Better To Use Boiling Water Or A Heat Gun For A Dent?
Boiling water is safer for the paint, and heat guns are faster. Boiling water caps at 212°F, a temperature that automotive clear coat can withstand without damage. Heat guns can exceed 1000°F, creating a high risk of blistering or burning the paint if held stationary.
Professional detailers warn that overheating clear coat causes it to separate from the base color layer, leading to peeling weeks later.
Start with boiling water. It covers a larger surface area evenly. Only graduate to a heat gun if the plastic is too stiff to respond to water, and keep the gun moving constantly.
How Much Does Syed Brothers Charge For A Bumper Repair Estimate In OKC?
Estimates are typically provided at no cost. Reputable body shops, including Syed Brothers, offer complimentary visual inspections to assess the scope of work. The estimator will look for indirect damage, such as misaligned trunk lids or broken lights, which often accompany bumper hits.
Always get a free estimate before buying DIY tools. The damage may be cheaper to fix professionally than you assume, or it may involve safety components you missed.
Will My Car Insurance Cover A Minor Bumper Dent?
Coverage applies, but filing a claim is often financially unwise. If the repair cost ($400) is less than or close to your deductible ($500 or $1,000), filing a claim yields zero payout. Filing a collision claim can raise your premiums by 20-40%, depending on your state and driving history, costing you more in the long run than the repair itself.
Pay out-of-pocket for repairs under $1,000 to keep your claim history clean and premiums low. Save insurance for major accidents.
Can You Fix A Bumper Dent If The Plastic Is Cracked?
No, heat cannot repair severed plastic bonds. A crack means the thermoplastic has sheared. Heating it will not fuse the two pieces back together. Proper repair requires "plastic welding" (melting a filler rod into the crack) or using a structural two-part epoxy patch on the backside, followed by cosmetic filling and painting.
Replace the bumper or seek professional repair. DIY glued cracks usually fail due to road vibration and temperature fluctuations.
How Long Does A Professional Bumper Repair Take At An OKC Body Shop?
It ranges from one to three days, depending on the method. Paintless Dent Repair (PDR) can be done in hours. Traditional refinishing requires time for disassembly, primer drying, paint application, and curing. Paint manufacturers specify cure times between coats to prevent solvent pop and finish defects. Rushing this leads to poor quality.
Ask the shop if they can pre-order parts. If a replacement is needed, they can paint the new bumper before you drop off your car, reducing your downtime to a single day.
Does Fixing A Dent Myself Void My Vehicle Warranty?
It does not void the entire warranty, but it may affect specific coverage. Under the Magnuson-Moss Warranty Act, a manufacturer cannot void your powertrain warranty because you fixed a bumper dent. However, if your DIY repair damages a parking sensor or causes the paint to peel later, the dealer will deny warranty coverage for those specific components.
Proceed with caution. If the car is leased, DIY repairs are strictly scrutinized upon return. A professional receipt is your safety net against lease-end penalty fees.
Are Suction Cup Dent Pullers Effective On All Types Of Car Dents?
Suction cups work only on flat, non-porous surfaces. A suction cup needs a perfect vacuum seal. If the dent is on a sharp body line, near a sensor hole, or on a curved edge, the cup cannot seal. Physics dictates that the surface area of the cup must be smaller than the flat area of the dent. They fail on deep, sharp dents where the metal or plastic is stretched tight.
Use suction cups for broad, shallow "soft" dents. For sharp dings, glue-pulling kits or professional PDR tools are required.
What Should I Do If My Bumper Sensors Are Acting Up After A Small Dent?
Stop driving or disable the system and seek professional calibration immediately. ADAS (Advanced Driver Assistance Systems) sensors operate on millimeter-wave radar. A dent can alter the sensor's angle by a fraction of a degree, causing it to look at the ground or into the wrong lane. A misaligned sensor can cause automatic emergency braking to trigger falsely or fail to detect an obstacle.
This is not a DIY fix. It requires factory scan tools and targeting boards to reset the sensor's "zero point." Visit a shop like Syed Brothers that specializes in ADAS calibration.
How Can I Find The Exact Paint Code For My Vehicle's Bumper?
The code is located on the Manufacturer's Information Label. You will find this sticker in the driver’s side door jamb, the glove box, or under the spare tire cover in the trunk. The code is typically a 2-4 character alphanumeric sequence (e.g., "NH-731P" for Honda or "WA8624" for GM).
Never buy paint based on the name (e.g., "Arctic White"). Manufacturers have dozens of variants for each color name. Always order by the specific code to ensure a match.
Is It Cheaper To Repair A Bumper Or Replace It Entirely?
Repair is generally cheaper, but labor costs affect the break-even point. Repair is labor-intensive (sanding, filling). Replacement is parts-intensive. If a technician needs 10 hours to reconstruct a bumper, the labor cost will exceed the price of a new bumper cover (which might only take 3 hours to paint and install).
Trust the shop's assessment. If the quote to repair is within $100 of replacement, choose replacement for a longer-lasting result.
Can Metal Bumpers Be Repaired Using The Hot Water Method?
No, metal requires physical force and cold-working techniques. Steel and chrome bumpers do not have thermal memory. Boiling water will simply clean them. Metal stretches when it dents. To fix it, the metal must be "shrunk" back to size using a torch and water quench or hammered flat using a dolly.
Do not apply heat to chrome bumpers, it can discolor the plating. Leave chrome and steel repair to professionals or buy a replacement part.